Showing posts with label gluten free. Show all posts

Thursday, August 25, 2016

Strawberry Basil Spritzer

I've been on a basil kick lately. I bought fresh basil in the hopes of making my most favorite sauce ever: pesto. But then a watermelon lemon-lime cold-pressed juice from Aldi caught my eye and I took it home. After that I remembered a basil fruit drink recipe vaugly and decided to add basil to my watermelon juice. Yum! What an interesting combo... Which brings me to my current recipe. Feel free to make it a virgin. I am feeling frisky so I'm adding rum.


Side note: recipes are not set in stone. Mix it up! Add more berries, take out the rum, whatever. Make it yours because you are the one drinking it. I never follow recipes exactly. I just look them up for ideas and then make it my own. Do you.

Strawberry Basil Spritzer

Ingredients:
6-8 small frozen strawberries
2 or 3 medium basil leaves, sliced into strips
1-2 oz white rum, optional
1 tsp agave nectar, or to taste
Club soda

Instructions:
Muddle the strawberries, basil, agave, and rum in the bottom of a glass. I use the end of a wooden spoon for this. Top off with the club soda. Enjoy!


Thursday, August 14, 2014

Buttery Shrimp and Green Bean Scampi

 I came home from work and looked in my fridge and freezer. I wanted a quick, tasty meal. I had a Chopped flashback, to when I had cable and watched nothing but Food Network and Discovery ID. Literally those two channels were the only ones I watched, wait no I lied. I watched Animal Planet too. A lack of cable tv is probably for the best, since I was addicted to shows like Deadly Women. My fiance would come home and be terrified that I was going to kill him. Oops, haha.

 I saw some frozen salad shrimp and immediately wanted some garlic and butter. I was feeling lazy so I then looked for a frozen bag of steamable veggies. The only steamy veggies I had were green beans, which worked out perfectly, and delishly if I can say that. I know it's not a word, but it's my blog and I do what I want.


Buttery Shrimp and Green Bean Scampi

3 oz frozen salad shrimp, more if you are feeling hungry
1-2 TBSP butter
2-3 cloves garlic, sliced
1 bag steamable green beans, cooked according to the directions
salt, pepper to taste

Melt butter in a saucepan on medium heat and add the slices of garlic until cooked, but not brown. Add frozen salad shrimp until thawed and warm. Add salt and pepper to taste. I added some basil in the picture above, because it's the best herb ever. Add cooked green beans, stir and eat it all up!

Wednesday, August 6, 2014

Lettuce Wraps with an Asian flair

I love lettuce wraps, so cheap, easy, and delicious. These are very customizable,  but hey I think about every recipe is easily changed. 😀

In case you haven't noticed, I don't measure things out. I just add stuff until it tastes good. You should try it. Just keep in mind that you can always add more but you can't take away if you have added too much.

Lettuce Wraps with an Asian flair

1 pound ground turkey
1 small cabbage, chopped finely
2 carrots, shredded
Spices: ginger, salt, pepper, garlic, coconut aminos
Green onion, sliced

Romaine lettuce leaves

Brown the turkey in a large skillet on medium high heat. Add the cabbage and carrots and place a lid on top to steam the cabbage, turn down heat to medium low and cook until cabbage is tender. Season to taste with spices and coconut aminos. Spoon mixture onto lettuce leaves and garnish with green onion. Grab some napkins and enjoy!

Sunday, June 29, 2014

Tilapia Grilled in Foil Packets

It was too hot to bake, and I wasn't sure how to grill tilapia. Thank goodness for Google. I searched for a grilled tilapia recipe and some lunatics out there actually tell you to grill the fish, right on the grill grates! Oiled of course, but still! There is no way I could pull that one off. Thankfully I happened upon foil packet recipes and came up with this one. I didn't have lemon, so I used lime. I don't really recommend that, it turned really bitter. Is that what happens to limes, but not lemons? Every recipe I saw said to use lemons. Oh well, it was edible. Fiance actually took some to work and ate it cold on a salad. I'm so proud of him! We are rocking this 21DSD journey!

Use lemons not limes, they make stuff weird
Ingredients
12 tilapia filets, thawed
2 small shallots, chopped
4 cloves garilc, chopped
1- 2 lemons, sliced
salt and pepper

Directions
Preheat grill to 350 degrees.
Mix shallots and garlic in a small bowl, set aside. Place fish in the center of a foil square. We had 3 filets in one foil packet, so you'll want to do four packets of three filets each. Evenly divide the shallot mixture amongst the 4 packets. Place a lemon slice or two in each packet. If you like lemon, add more or less to your tastes. Sprinkle fish with salt and pepper. Fold the packet long ways first, then the sides. Google foil packet if you've never done it. You want your packet to be air tight, the fish will essentially steam in the packet.
Place on grill and leave on there at 350 degrees for 15 min. Our grill may have been a bit hotter. These were possibly over done at 15 min. Just make sure you are careful when you open that foil packet and make sure your fish are done.
Enjoy!

Thursday, June 26, 2014

Guacamole

Avocados rock, they hit the spot all the time. They are really good especially when you cut carbs and sugar and are craving...well, anything. Guacamole is loaded with good fats, so it might actually replace the ice cream that I'm craving. I cut out nightshades, so this doesn't have any jalapenos, and I actually love it! So does fiance! Also, I forgot to buy cilantro, so there's none in here but I bet that would be a great addition.

This was my dinner the first night of my 21DSD, featuring my turkey meatballs that I have yet to create a recipe for, and jicama
Guacamole

1 shallot
4 cloves garlic, peeled, more or less to taste
3 avocados, chopped in big chunks
quarter of a lime
dash salt and pepper

In a food processor, pulse the shallot and garlic cloves until chopped finely. Add the avocado chunks, and squeeze the lime so the juice goes on the avocado. Get as much juice out of the lime slice as you can, this will help keep the guac from becoming brown. Add salt and pepper. Pulse until the guac reaches desired consistency. Some people like it chunky, others like it smooth. Smooth is good, but so are chunks, I can never decide. Keep refrigerated. It can keep for a few days, but will likely start to brown. You can also freeze this, it will keep for months, and defrost in the fridge.

Tuesday, June 24, 2014

21 DSD Chicken Salad with Mustard Dressing

 Being on Day 2 of  my sugar detox, check out my journey here, I've got a killer headache (I cut caffeine out as well) so I'll keep this brief. I'm also answering a million questions since fiance is now home, he's helping put away my detox ice cream that I made from PaleOMG. Yeah, Aunt Flo is in town and I really REALLY needed some ice cream, that and I had to use up a sweet potato.
 Keeping it simple today with a salad. I know BORING but it's hot as heck out there. Once I start actually eating a salad I realize how good it is and gets better the more I eat it. It usually hits the spot even if I don't think it will.
This dressing recipe is one I made up while on my TLS detox. Instead of oil, I used mustard, but for the sugar detox I'm adding olive oil. I also like my dressing TANGY, which this really is.

1/2 bag salad mix
sprinkle of fresh spinach, torn
capers
radishes
grilled chicken thighs seasoned with salt, pepper, garlic

Mustard Dressing
1/2 cup apple cider vinegar
splash of water
1 tbsp spicy brown mustard, or dijon
1-2 tbsp spices including garlic, parsley, chives, marjoram, thyme
salt and pepper to taste
1/4 - 1/2 cup olive oil

Create a bed of lettuce with salad mix and spinach. Add chicken and your toppings, I had radishes and capers on mine. For the dressing, mix everything but the oil in a glass jar until combined, then add oil and mix to combine. This is best done is a glass jar with a lid, I sometimes use my old mustard bottle. Play around with spices, vinegar, whatever suites your tastes. I never measure anything, so just eyeball it. Play with your food and enjoy!

Sunday, May 25, 2014

Black Bean PB2 Brownies

So I can't be the only person out there that can't have chocolate or soy. When you have a hankering for brownies, that tends to put a damper on things. I came across Domino Sugar's brownie recipe and this product called PB2 while browsing the interwebz. The future inlaws talked about PB2 and how cool it was a year ago and I just thought that was weird. Who needs powdered peanut butter? Not me. Yeah, no it sure as heck is me. Cocoa powder, being the dreaded chocolate, gives me migraines and is hard to replace in brownies. PB2 solves that problem for me, it's essentially a flavored powder that works great in brownies, and apparently smoothies which I can't wait to try.

Forgot about the walnuts!! I added them just after I put it in the oven. Oh and that pan is not 8X8. It was a gift and I have no idea what size it is. Be sure to actually use an 8X8 pan, it'll probably make for better brownies.

If you think that it's weird that there are beans in these brownies, it's ok. I felt that way too, but with enough PB2, vanilla, coffee, etc. the bean taste gets masked. The black beans are also a fun way to fool all your friends that you made chocolate brownies when in fact you actually made peanut butter bean brownies. If you can have cocoa powder, you lucky bastard you, then feel free to replace the PB2 with it, or use the chocolate PB2.

This recipe was inspired by Domino Sugar's recipe found here.

They are really thin since I was a rebel and used a larger pan. Don't be a rebel, use an 8X8 square pan

Black Bean Brownies 


Ingredients List 

1 can (14.5 oz or something like that, didn't write that down) - canned black beans, rinsed and drained
1 tablespoon - brewed coffee, cooled
1/2 cup - sugar
1/4 cup - coconut oil
1/4 cup - unsweetened applesauce
3/4 cup - PB2 powdered peanut butter
2 - large eggs
2 teaspoons - vanilla extract
1/4 teaspoon - salt
dash cinnamon
1/4 cup - chopped walnuts, optional

Instructions


Preheat oven to 350°F. Grease an 8x8-inch baking pan with cooking spray and line with parchment paper. Grease top of parchment. Set aside.
In a blender/food processor, blend black beans and coffee until smooth. Add sugar and remaining ingredients. (Do not over mix.) Scrape down sides of the bowl. Fold in walnuts, if using. Pour batter into the pan and bake 30 to 35 minutes until the brownies begin to pull away from the side of the pan. Cool and cut into 16 squares.

In the spirit of full disclosure, please note that when you click links and purchase items, I may receive a commission. I only recommend products & systems that I use and love myself, so I know you’ll be in good hands.

Thursday, May 8, 2014

Sweet Potato Hummus aka Yummus!

Gotta have your carrots to keep it healthy, and orange!
  This paleo hummus recipe has gotten rave reviews at work, boys included, and everyone has asked me for this recipe. So, I figured that I wouldn't deprive the world, here it is! This is a simple recipe that anyone can alter according to his/her individual tastes. You could add pesto, roasted red peppers, spinach, what ever you want! Also, there are no chick peas in this, which makes it paleo, but also doesn't make it "hummus." So I've endearingly titled it Yummus, patent pending. Not really, let's be serious. If I had the time and money I would though.


INGREDIENTS 
1 Medium sweet potato, baked then cooled 
2 Tbsp Oil 
1 tsp Water 
1-2Tbsp Lemon juice, to taste 
1 tsp Cumin 
½ tsp Salt 
¼ tsp Pepper 
3 Cloves roasted garlic, to taste

DIRECTIONS 
1. Blend all ingredients in food 
processor/blender. Adjust seasonings to taste, 
add more water if it's too thick- 1tsp at a time. 

Saturday, July 21, 2012

Gluten Free Molten Lava Cakes

 I saw my favorite girl chef Anne Burrell making some totally mouth-watering molten lava cakes. I thought to myself, I can totally make these gluten free. The trick for me? Making them chocolate free, as chocolate causes migraines. I can have white chocolate though, so I figured I would give it a shot. And I am so glad I did.
 I altered Anne's recipe a bit, but not by a lot. I used white chocolate, with some green colored melts that I had left over from some candy making, instead of semisweet chips. And of course I used gluten free flour instead of the evil wheat flour. I think it turned out well, and cured my chocolate craving at the time. It is VERY rich, so it's not going to be an everyday thing. It is good for when you get a serious craving.
 First you'll want to spread melted butter into your ramekins, or spray with canola oil like I did. I did not have ramekins, so I used ovenproof custard cups. The cakes were a little difficult to get out in one piece, so if you have the ramekins use them for sure. Then pour sugar into the ramekin, coating every inch. This "helps" keep them from sticking, but it also makes a tasty, crunchy outer crust.

 Then you'll want to melt your chocolate with some butter. I used a heat-proof bowl and put it over simmering water on the stove. Once melted take off the heat and set aside briefly.
 Once your chocolate is melted beat your eggs, egg yolks, sugar, and vanilla in a mixing bowl. Beat until the color is a pale yellow and thick. Like this:
 Next you'll want to gently combine the melted chocolate with your egg mixture, followed by your gluten free flour mix. Then you'll want to pour your batter into your sugared ramekins/ custard cups.
Yes it's green, no it's not mint flavored
 Bake in the oven and then you're in for a treat.
a bit lopsided, but still delicious


 I attempted to take a picture of this molten cake in all its glory, but as stated previously I couldn't get them out of the cups in one piece. But I will leave you with this picture.
not quite molten, but still darn good with strawberries :)

Chef Anne and CrazyGlutenFreeLady's Molten Chocolate Lava Cakes

Ingredients

  • 1 stick unsalted butter
  • Cooking Spray
  • Granulated sugar, for the ramekins
  • 1/2 (6-ounce) bag white chocolate chips
  • 3 eggs
  • 3 egg yolks
  • 1 1/2 cups powdered sugar, plus a little more for dusting
  • 1 teaspoon vanilla extract
  • 1/2 cup gluten free flour blend with starches
  • Sliced strawberries, optional
  • Special equipment: 6 ramekins or oven proof custard cups

Directions

Preheat the oven to 425 degrees F.

Spray the inside of 6 ramekins or oven proof custard cups with cooking spray. Coat the inside of each ramekin with granulated sugar. Reserve.

Put the stick of butter and chocolate chips in a large mixing bowl. Set the bowl on a saucepan filled with about 1-inch of boiling water. Be sure that the bowl is not touching the water. Gently stir the butter and the chocolate together until melted and the mixture is smooth. Turn off the heat and reserve.

Combine the eggs, yolks, sugar and vanilla in the bowl of a stand mixer. (This can also be done with a hand beater.) Beat the egg mixture until it doubles in size, and gets very thick and very pale.

Gently whisk the melted chocolate and butter into the egg mixture. Remove the bowl from the mixer and gently stir in the flour. Pour the batter into the prepared ramekins. Arrange the ramekins on a baking sheet and bake in the preheated oven for 14 to 15 minutes. Remove the cakes from the oven and let rest for 3 to 4 minutes.

Remove the cakes from the ramekins, and arrange them on individual serving plates garnished with slices of strawberries. Refrigerate any leftovers.

Sunday, July 15, 2012

Slow Cooker Pulled Pork BBQ

 One of my favorite ways to cook is to use the slow cooker. Dump everything in the slow cooker, turn it on, and in a few hours you're good to go. It doesn't get any easier. I wish I could cook everything in that thing. It's been so hot lately I don't even want to think about turning on the oven. The slow cooker totally solves that dilemma, and makes food super tasty.
 I like to get pork shoulder when it's on sale and freeze it until I'm ready to make some pulled pork. I usually thaw my meat before doing the slow cooker thing. And now Let's do this....
 I put my pork shoulder in the crock pot. I like to stir all my liquids, spices, and sauces in a small bowl, or my measuring cup, before I add it into the crock pot. After that, set it to low or high depending on what time you wanna eat and that is it. So easy.
time to shred these puppies
 The only not fun part of this recipe is the actual shredding the meat, unless you're into that kind of thing. I usually make boyfriend help with this part ;)
shred that bad boy
 After you are all done shredding the pork, add it back into the delicious sauce you've created in your crock pot.
Aw yeah
 And there you have it, the easiest and tastiest pulled pork BBQ you'll ever make.
wraps: not the best idea for the pulled pork...
pulled pork nachos...much better choice ;)

Slow Cooker Pulled Pork BBQ

Ingredients

  • 1 cup barbeque sauce
  • 1/2 cup apple cider vinegar
  • 1/2 cup chicken broth
  • 1/4 cup light brown sugar
  • 1 tablespoon prepared yellow mustard
  • 1 tablespoon Worcestershire sauce, optional
  • 1 tablespoon chili powder
  • 1 bunch green onion, chopped
  • 2 large cloves garlic, crushed
  • 1 1/2 teaspoons dried thyme

Directions

  1. Place the pork roast into the slow cooker. In a small bowl mix the barbecue sauce, apple cider vinegar, and chicken broth. Stir in the brown sugar, yellow mustard, Worcestershire sauce, chili powder, onion, garlic, and thyme. Add this mixture to the slow cooker, covering the pork. Cover and cook on High until the roast shreds easily with a fork, 5 to 6 hours.
  2. Remove the roast from the slow cooker, and shred the meat using two forks. Return the shredded pork to the slow cooker, and stir the meat into the juices.
recipe adapted from allrecipes- I didn't use the Worcestershire and still thought it tasted great.

Thursday, July 5, 2012

Gluten Free Pizza Crust

 You had to know this one was coming. On the list of things I would eat in a heartbeat if my health was of no concern, near the very top would be pizza. Meat lovers to be exact. This recipe helps you get more love in your tummy, and is borrowed from Sonja Stewart at Wise Bread.
 While a meat lovers pizza may be in the works one day, taco pizza is on the menu today. Good thing I gave you that taco seasoning recipe ;)
 This crust is spot on, if you have a pizza stone or metal pizza pan with holes in it I'm sure it would be EXACTLY like you've dreamed of. I don't have either of those things, but still adore this crust. It's taken me some time to get used to it's little nuances, so if at first you don't succeed, try again. You'll live. I promise.
 The first thing you want to do is proof the yeast. I preheat the oven and gather all my ingredients while the yeast puffs up.
oooo bubbly
 After your yeast is puffy, add vinegar and oil. Next get all your dry ingredients and mix well. Let the mixer go an extra minute to make sure the xantham gum gets evenly distributed.
 Then you'll want to add your liquid ingredients to your dry ingredients.
This is how your dough should look
 You'll want to roll out your dough between layers of flour dusted parchment paper or plastic wrap. I can't seem to roll out this dough for some reason, so I partially roll out the dough and press it the rest of the way into my pan.
I do love me some square pizza
 After you get your dough in your pan, bake your crust until golden brown around the edges. It doesn't get super crispy, but it's tasty.
the crust shrank a bit :(
 Add your favorite sauce, cheese, and toppings and bake again to melt the cheese. Let cool slightly before slicing, if you can restrain yourself.
so flippin good
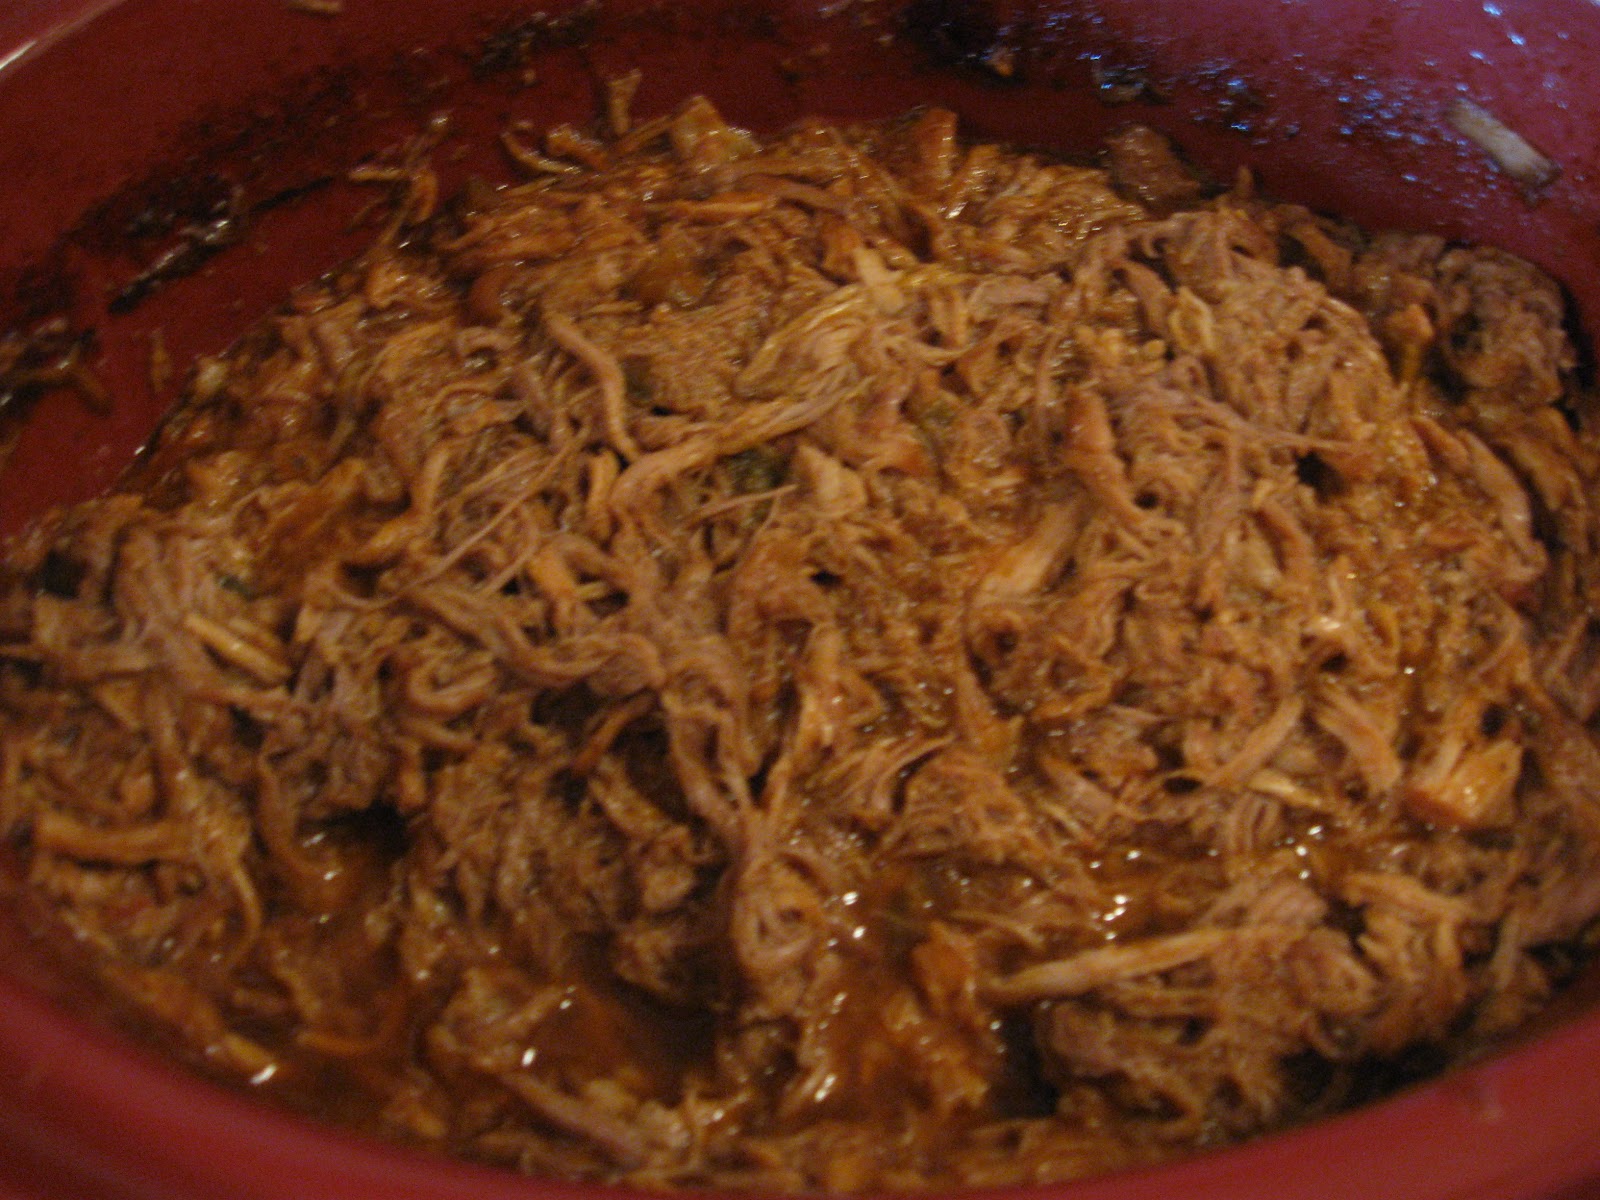
 I decided to make mine into a taco pizza, with seasoned ground beef, lettuce, and taco sauce.
yummmmmy

Gluten Free Pizza Crust

  • 1 Tbsp yeast
  • 1 1/3 cup milk
  • 1 tsp. sugar
  • 2 1/3 cup gluten-free all purpose flour mix
  • 2 tsp xanthan gum
  • 1 tsp salt
  • 2 tsp. olive oil
  • 2 tsp. cider vinegar
  • 1/3 cup (more or less) gluten free corn meal.
Preheat your oven to 400 degrees.
Heat the milk using your microwave or a small saucepan, to just above room temperature, or 105 degrees with your thermometer. Remember you want it hot, but you should be able to touch it slightly with your finger. Mix in the yeast, sugar and milk in a medium bowl and set it aside.
In your mixing bowl, mix the flour, salt and xanthan gum well. Your yeast mixture should be foaming by now. Add the apple cider vinegar and olive oil to the yeast mixture and then throw it into the flour blend. Mix it well.
I like to use parchment paper because it's easy to roll out and transfer onto the baking sheet. However, it isn't needed. Drop your dough out onto a well floured surface (like parchment paper) and add corn meal. Sprinkle the corn meal liberally as you roll out. Sprinkle it out on the top as well. Roll out the dough to about 1/8 inch thickness. Transfer the dough onto your baking sheet and cook it until the dough has a slight touch of golden brown. Throw the sauce on the crust, add cheese and toppings, then throw it back in the oven until the cheese is melted.

Tuesday, July 3, 2012

Egg-based Gluten Free Hot Dog Buns

Homemade chili cheese dog, it's heaven in a bun

Just in time for holiday barbeques and grill outs is this hot dog bun recipe I've been working on. I got it from the Gluten Free Hub.
 Gluten free buns from the store are super expensive, and the ones I tried are so dense they're borderline dry. With that being said, I thought I'd give homemade hot dog buns a try. These ones are spongy, and not dry at all.
mini loaf pans end up being the perfect bun size

 My version of the GF Hub's recipe cuts way back on the sugar. With it made as originally written, it comes out super sweet which is kinda off-putting (to me) in a savory bun. I've been playing around with this recipe because the buns keep sinking in the middle, which may be because I cut back on the sugar. I haven't completely perfected the recipe, but it satisfies my craving for a hot dog in a mostly suitable bun. I'll try with xantham gum next time, making sure my baking powder is completely mixed in, unlike last time.

my attempt at spiral hot dogs

Egg-based Gluten Free Hot Dog Buns

  • 4 mini loaf pans 
  • 4 eggs
  • 1 tsp. water
  • 3 tsp. sugar
  • pinch salt
  • 1/2 cup potato starch
  • 4 tsp. baking powder
  • 1 tsp. dried oregano or Italian seasoning (optional)
  • sesame seeds (optional)
Preheat your oven to 350° F. Grease pans with cooking spray. In a medium mixing bowl, whisk the eggs, water, sugar, and salt. Mix in the potato starch and oregano (the oregano helps mask the residual egg flavor, and adds a nice spice to the bun). Make sure the starch is completely mixed in before adding the baking powder. Whisk in the baking powder, quickly to make sure there are no lumps, but do not overmix. Working quickly, distribute the mixture evenly among four mini loaf pans. If using sesame seeds, sprinkle them on before placing in oven. Bake the mini loaf pans for 16-20 minutes in the oven, or until the tops are golden brown.

Wednesday, June 27, 2012

Enchilada Meatballs

 This is a really unique, and fun recipe that I got from allrecipes, my favoritest website in the whole world, after lolcats of course. It's meatballs with a Mexican flair, great for parties or just a fun dinner.
 My version, of course, is gluten free and everything is made from scratch. I made the cornbread, and enchilada sauce from scratch. Cornbread is the coolest part of this recipe. The cornbread is the bread crumbs! Genius!
 You can eat this as a snack, appetizer, or dinner- just jazz it up with taco fixings and make meatball tacos in corn tortillas. Those meatball tacos were tasty. This time around I didn't put any cheese in my mixture and the meatballs fell apart really easily. The taste was spot on, but they weren't very pretty.
 So, the first thing you want to do is make the cornbread, adding some taco seasoning in with it. They say a packet, but I make my own taco seasoning, so about two tablespoons worth. This taco seasoning is fabulous. The cornbread recipe I use is here.
Before baking
After baking. And looking great I must say
 Let your cornbread cool. Then make bread crumbs. It's super easy, just look...
yep I used my mixer to make bread crumbs, pure genius
 Cornbread is a more crumbly type of bread so you can just put it in your mixer and let it go to town.
 While the cornbread was baking I made the enchilada sauce. I doubled that recipe for the meatballs. You'll want extra to pour over the meatballs.
this is what it looks like before reducing
 Now that you have your breadcrumbs and enchilada sauce, you can finally make your meatballs! Just combine the enchilada sauce, slightly cooled of course, and breadcrumbs with your mixer. Then add the ground meat, and cheese if you're feeling cheesy. I let my mixer do all the work, maybe that's why my meatballs fell apart, but I'd rather my mixer get yucky than my hands.
Oh yes I did, no yucky hands for me
 Then you want to form the meat mixture into balls. I like to use my ice cream scoop for this. It makes them each the same exact size and it's really fast.
and of course this scoop broke right after this picture. fail
 After you bake the meatballs, you can put them in another pan and pour your extra enchilada sauce on them. Or if you're like me and don't want to dirty another pan, you can put them in your enchilada sauce that's still in the pot, hoping your meatballs won't fall apart stirring them. Good luck and have fun!

another attempt at being artsy

Ingredients

  • 2 cups crumbled cornbread
  • 20 enchilada sauce, divided
  • 1/2 teaspoon salt
  • 2 tablespoons taco seasoning
  • 1 1/2 pounds ground beef
  • 1 cup shredded Mexican cheese blend, divided (optional-see note)

Directions

  1. Preheat the oven to 350 degrees F (175 degrees C).
  2. In a large bowl, combine the cornbread, 10 oz of the enchilada sauce, half of the cheese if using, salt, and taco seasonging. Crumble the beef into the mixture, and blend well. Shape meat into 1 inch balls, and place on a 10x15 inch jellyroll pan, or any cookie sheet with sides to catch the grease.
  3. Bake for 18 to 22 minutes in the preheated oven, until the meat is cooked through.
  4. While the meatballs are cooking, warm remaining enchilada sauce in a saucepan. Remove the meatballs from the pan using a slotted spoon, and place in a serving dish. Pour the heated sauce over them, and sprinkle the rest of the cheese on top. Provide toothpicks for serving.

Friday, June 22, 2012

Red Enchilada Sauce

 I love enchiladas. What I hate? That stupid red enchilada sauce you get from a can. It just tastes bad to me. And of course I have to make sure there's no bad stuff in it like gluten or MSG. In addition, my boyfriend can't tolerate bell peppers, so we have to be on the look out for those as well. You know what? I'm tired of reading all these labels just to be mad at the gross sauce anyway. So, I am going to make my own. This has become a mantra for me.
 This recipe is pretty easy. Just saute garlic, and shallot; add spices; add tomato sauce, salsa, and chicken broth. Then huzzah! A yummy enchilada sauce. It may not be entirely authentic, but it's darn good.
spicey!

Ingredients

  • 1 tablespoon olive oil
  • 2 cloves garlic, minced
  • 1 teaspoon minced shallot
  • 1/2 teaspoon dried oregano
  • 2 1/2 teaspoons chili powder
  • 1/2 teaspoon dried basil
  • 1/8 teaspoon black pepper
  • 1/8 teaspoon salt
  • 1/4 teaspoon ground cumin
  • 1 teaspoon dried parsley
  • 1/4 cup salsa, blended smooth in a blender
  • 1 (6 ounce) can tomato sauce
  • 1 1/2 cups chicken broth

Directions

  1. Heat the oil in a large saucepan over medium heat. Add the garlic and shallot and saute for 1 to 2 minutes. Add the oregano, chili powder, basil, ground black pepper, salt, cumin, parsley, salsa and tomato sauce.
  2. Mix together and then stir in the chicken broth. Bring to a boil, reduce heat to low and simmer for 15 to 20 minutes.

The Best Taco Seasoning

 This is the best taco seasoning I've ever had. And it's so much better for you than store bought. It lasts months stored in a covered container, so you can't go wrong. If you don't want to use the cornstarch, you can sub any other starch. Or if you don't need thickening in your dish just omit the starch all together. Sometimes I like to go a little crazy and use marjoram instead of oregano, I find it has a milder taste.

Ingredients

  • 1 tablespoon chili powder
  • 1/4 teaspoon garlic powder
  • 1/4 teaspoon onion powder
  • 1/4 teaspoon cayenne pepper
  • 1/4 teaspoon dried oregano
  • 1/2 teaspoon paprika
  • 1 1/2 teaspoons ground cumin
  • 1 teaspoon sea salt
  • 1 teaspoon black pepper
  • 1 tablespoon cornstarch

Directions

  1. In a small bowl, mix together chili powder, garlic powder, onion powder, cayenne pepper, oregano, paprika, cumin, salt, pepper, and cornstarch. Store in an airtight container.

Gluten Free Corn Bread

 This corn bread is soooo good, and quick to make. It tastes great with chili, or warm out of the oven with some butter spread on it. It also makes great breadcrumbs, as in my enchilada meatballs.


Ingredients

  • 1/2 cup gluten free cornmeal
  • 1/2 cup gluten free flour blend
  • 2 tablespoons sugar
  • 2 teaspoons gluten free baking powder
  • 1/4 teaspoon salt
  • 1 egg, beaten
  • 1/2 cup plain soy or almond milk
  • 2 tablespoons corn oil

Directions

  1. In a bowl, combine the cornmeal, flour blend, sugar, baking powder and salt. In another bowl, blend egg, milk and oil; stir into dry ingredients. Pour into a greased 8-in. x 4-in. x 2-in. loaf pan. Bake at 425 degrees F for 15-18 minutes or until a toothpick inserted near the center comes out clean. Cool for 10 minutes; remove from the pan and serve warm.

Gluten Free Flour Blend with Starches

 This is my go to gluten free all purpose flour blend. I got it from Land O'Lakes website, of all places right? It's pretty basic, features two different starches, and works well with cakes and muffins, sometimes cookies. I put the mix in a plastic container with a lid and shake it up.

Ingredients


2 cups white rice flour
2/3 cup potato starch
1/3 cup tapioca flour
1 teaspoon xanthan gum

Directions

Combine all ingredients in large bowl; stir.
Use mixture in baking recipes. Store mixture in container with tight-fitting lid; stir before using.

Wednesday, June 13, 2012

Boyfriend's Teriyaki and Ranch Portabella Sandwiches

 This recipe is near and dear to my heart. My boyfriend made it the first time I visited his place. It also was one of those moments in the beginning of a relationship where you realize this one is the one for me, no doubt about it. A man that can cook, and loves mushrooms! I'm in love for the long run. Little did I know that this is one of about three recipes the man can cook without asking me a question. Oh well I guess I'll keep him. He puts up with all my nonsense, so I really have to keep him.
 This is a seemingly random set of ingredients, I like to call it Pittsburgh random. I have no idea how bf came up with this, honestly. I'll have to ask him sometime.
 The sandwich, in my case lettuce wrap, consists of gluten free teriyaki marinated portabella mushrooms, swiss lace cheese, french fries, and homemade ranch dressing. I can only have homemade ranch dressing, as pretty much every commercial ranch has MSG, a major migraine trigger. (My favorite ranch recipe is from Allrecipes. If you click on ranch dressing at the bottom there's a link to the recipe.) The teriyaki and ranch combo sounds strange, but it is fantastic. It's a great contrast with creamy and tangy flavors.
 You'll want to start with marinating the sliced portabellas. My boyfriend likes to get the pre-sliced portabellas, the ones that come with a sauce packet, but we don't use the sauce. You'll want to marinate the portabellas for 6 hours but not more than 24 hours in the gluten free teriyaki sauce.
you can use a resealable plastic bag, I ran out this time of course

 After the portabellas are done marinating, you'll want to get your oven ready for the french fries. Once the fries are in the oven, start cooking the portabellas. Boyfriend is very specific when it comes to cooking the bellas. Grab a slice with tongs and lay it on a hot skillet. You want to saute the bellas individually, flipping them like they're chicken tenders or something. It does help to ensure that the portabellas don't overcook.
He's so cute when he cooks :)
This is what they look like when they are done

 When the portabellas are all cooked and the french fries are done, it is time to assemble the sandwich. Boyfriend insists on putting ranch dressing on both sides of the bread. Since I'm using a lettuce wrap, I just put it on the top. Put a slice of swiss lace down, the portabellas next, french fries after that, and voila! Yummy yummy in your tummy!
your mouth should be watering by now


see it IS possible to wrap that lettuce

Boyfriend's Teriyaki and Ranch Portabella Sandwiches

Ingredients

  • 1 10 oz bottle gluten free teriyaki sauce
  • 3 7oz packages sliced portabella mushrooms
  • 1 lb. frozen french fries
  • 1/3 cup ranch dressing, or to taste
  • 1/2 lb swiss lace cheese, or to taste
  • 4 hoagie rolls or 4 iceberg lettuce leaves, whole

Directions

  1. Place the portabellas in a gallon size resealable plastic bag. Pour teriyaki sauce over portabellas in bag. Place in refrigerator to marinate 6 hours to overnight.
  2. Preheat oven per directions on bag of frozen fries. Bake fries according to bag's directions.
  3. While fries are baking, heat skillet on med-hi heat. Place individual slices of portabellas in skillet. Cook 2 to 3 min on each side or just until tender. Remove from pan.
  4. To assemble sanwiches, spread 1 to 2 TB ranch, or to taste, on both sides of roll or lettuce wrap. Place one slice of swiss on the bottom. Place approx. 3 to 5 slices of portabellas on top of the swiss. Finish with about 6 to 8 french fries, or to taste. Enjoy!